
Change MDT Mapped Z: Drive
- Tenaka

- Aug 28, 2023
- 2 min read
Updated: Aug 18, 2025
When deploying a Windows operating system or installing MDT applications, a mapped network drive is usually mounted temporarily as Z:\. The letter "Z" is chosen because it is typically not used for local drives in most deployments, it's less likely to conflict with existing drive letters on the target computer.
What occurs when an application necessitates the use of the Z:\ drive during the process of deploying an image through MDT? It's often better to overlook your initial reaction.....Z: Being engaged during the operating system installation. Applications can persist with preconfigured mapped network drives.
The illustration provided represents a common example of a regular operating system deployment, and it's evident that the drive letter Z: is assigned to the MDT Deployment share.

There appear to be two approaches to altering the fixed Z:\ drive mapping to a different designated letter, although there might be additional methods available as well.
During my search for a solution, Google yielded no results, which could potentially be attributed to me asking the wrong questions. Late to the party and whilst writing this blog, ChatGPT provided a suggestion to address this issue, update the 'CustomSettings.ini' file by incorporating 'DriveLetter=Y'. Had it succeeded on the initial attempt, it would have presented a more graceful resolution, unfortunately, that wasn't the case, I haven't delved into the reasons behind the failure.
Let's proceed with a working solution by modifying the hardcoded drive letter in ZTIUtility.vbs.
I'm using PowerShell_ISE as it conveniently displays the line number. Browse to C:\MDTDeploymentShare\Scripts\ZTIUtility.vbs
Search for "z" and on line 3003 or thereabouts, depending on the version of MDT installed, update the hardcoded drive 'Z' to something else, not C: or X: as these are also used by the OS and MDT.

In this case, I've designated the letter 'T' as the new MDT mapped network drive.

Regenerate the Boot images by Updating the Deployment Share.
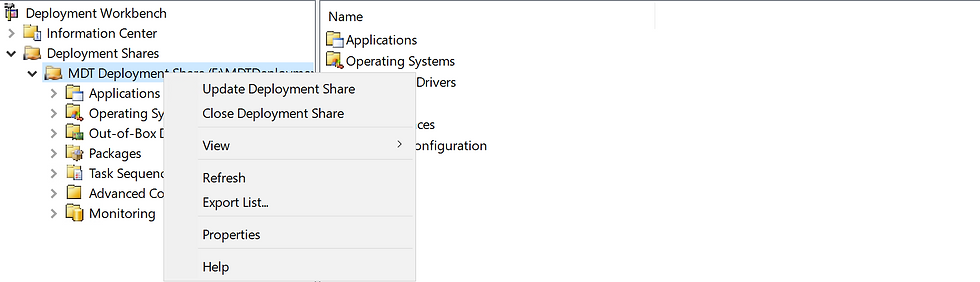
Choose 'Completely regenerate the boot images', then grab a coffee.

Launch WDS and Replace the Image.

Browse to the MDT Share and select the LiteTouchPE_x64.wim.

Deploy a new Windows OS from MDT Pxe and the MDTDeploymentShare is now mapped as "T:\".

If you found the content valuable, I encourage you to explore the MDT deployment guides and instructional resources available under the main website sections.
Finally, I'm headed off to have strong words with the individual responsible for implementing an application that requires hardcoded drives for configuration components.


Comments